
TABLE OF CONTENTS
Perhaps one of the trickiest steps in making sourdough bread—and something I still don’t get right 100% of the time—is bulk fermentation.
If you’re struggling with proper proofing times, or are looking to take your sourdough to the next level, this straightforward guide lays out everything you need to know:
- When fermentation truly begins
- How temperature and starter ratio affect rise and timing
- Why “doubled in size” can be misleading
- Simple ways to measure your dough’s rise accurately
- How to tell if your loaf was under- or overproofed
What is Bulk Fermentation?
Bulk fermentation begins the moment you mix active starter into dough, and is the first stretch of time when wild yeast and bacteria start metabolizing flour. In traditional baking with dry yeast, this stage is the “first rise”—but with sourdough, because the yeast is wild, this process takes much longer.
So why is it so tricky for beginners?
Because a well-proofed loaf means finding the balance between the wild yeast consuming “not enough” and “too much.” Too little, and the crumb turns dense and gummy; too much, and the acid buildup weakens the gluten structure.
It’s also tricky because most bakers rely on recipes for fixed timelines or cues—like “6 hours” or “doubled in size.” These aren’t reliable on their own, and there’s plenty of other factors to consider.
Instead of watching the clock, get to know your dough.
We’ll look at the factors often overlooked, and how understanding them can improve your results.
Temperature Matters
Like I discussed in my post about maintaining a sourdough starter, temperature is key. Warmer temperatures speed up the metabolism of the live cultures in your dough, and cooler ones slow them down.
So if you know your dough’s temperature and adjust fermentation time accordingly, you’re much less likely to under- or overproof your bread.
You may have had a sourdough recipe fail simply because it didn’t account for your kitchen’s temperature and climate. A 7-hour proof in a 75°F kitchen could take as long as 12–14 hours in a 68°F kitchen.

Temperature & Percentage Rise
I have to credit Tom Cucuzza, curator of The Sourdough Journey, for his expertise and the excellent free resources that completely changed my homemade loaves.
He explains that when you shape your dough and place it into the fridge for its cold proof, it takes time for the dough to cool to the fridge’s temperature. Until then, it continues fermenting—so the warmer the dough, the longer is takes to cool, and the longer it ferments.
This is why it’s often not ideal to let your dough “double in size,” especially if your dough or kitchen is warm.
As Tom outlines in his dough temperature and rise guide, a warm dough (around 75°F) should be shaped and placed into the fridge for its cold proof after rising about 50%—half of doubled.
For warmer doughs (around 80°F), the recommended rise is as little as 30%.
Amount of Starter Matters
The ratio of active starter to flour also affects bulk fermentation time. More starter means more yeast and microbes at work, so two doughs—one with 10% starter and one with 20%—won’t proof at the same speed, even at the same room temperature.
How to Properly Measure Dough Rise
It’s nearly impossible to judge how much a ball of dough has risen just by looking in a stainless steel or ceramic bowl.
Instead, use a clear plastic or glass container—or straight-edge dough bin—so you can easily mark or see the dough’s vertical rise.
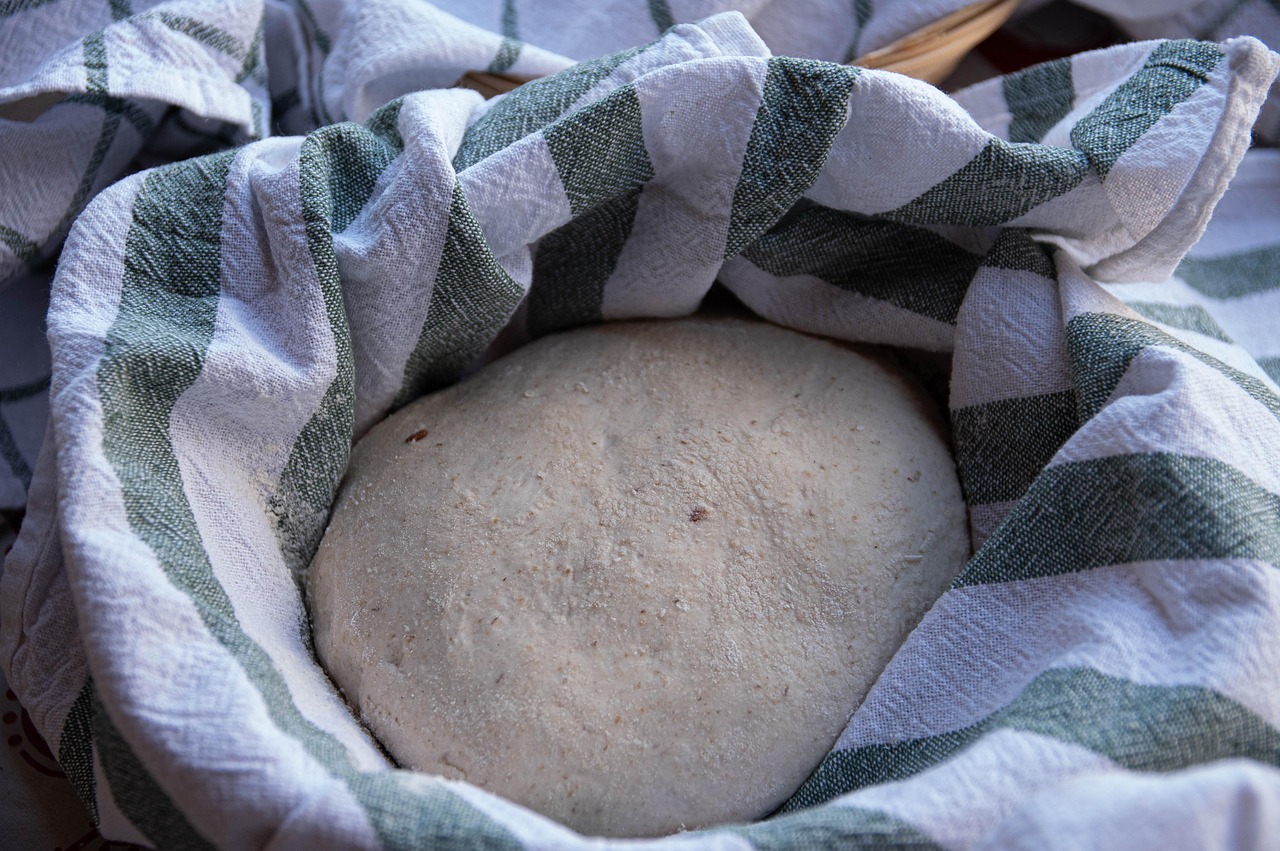
Shot Glass & Aliquot Method
If you don’t have a transparent container, or still struggle to see rise height in a rounded bowl, you can place a small amount of mixed dough into a straight-edged shot glass or container. I often use leftover soy sauce containers like these.

It might seem tedious, but when I tried the shotglass method, I found I was undershooting my proof time by as much as 1–2 hours. Here’s one of the loaves I made using this approach:

And honestly, it is a bit of a hassle at first, but over time you get used to your conditions and can judge proofing by look and feel.
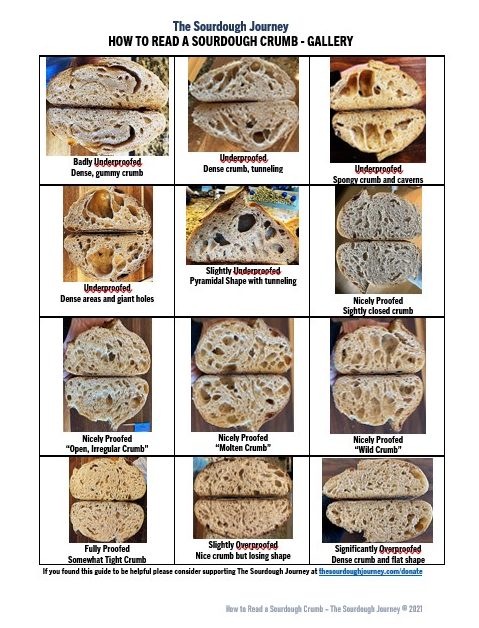
Underproofed or Overproofed?
Here, I’ll show you how to “read” your dough and crumb to determine if your bread was properly proofed.
The most reliable way is by examining the crumb. The Sourdough Journey also has an excellent visual guide for that, but here’s a basic overview.
Underproofed
- gummy
- poor oven spring
- large, gaping holes
- areas of density

Well-Proofed
- strong oven spring with “belly” and pronounced ear
- consistent-sized holes that look fully expanded
- balanced flavour
Overproofed
- very poor oven spring, often flat
- sticky, hard-to-handle dough
- consistent crumb, but holes look “collapsed”
- overly sour taste

With practice, you’ll quickly learn to spot these signs and adjust fermentation timing.
Key Takeaways
- Bulk fermentation is where wild yeast and bacteria build structure and flavour.
- Warmer dough ferments faster, cooler dough slower. Watch dough temperature and rise instead of the clock.
- More starter means faster fermentation.
- Don’t rely on “doubled in size.” Gauge rise by percentage based on dough temperature.
- Track rise visually with clear containers or the shot glass/aliquot method.
- Read your crumb. It’s the best indicator of under- or overproofing.
- Practice and observation will sharpen your instincts for perfect fermentation.
Final Thoughts
One of my favourite things about baking sourdough is that even underproofed or overproofed loaves can still be perfectly delicious. In fact, many bakers even repurpose overproofed dough for recipes like focaccia.
That said, I know how discouraging it can be to spend over 24+ hours on a recipe only to end up with a flat, gummy loaf. So I hope you found this overview insightful and useful if you’re struggling to nail a good proof.
Have you discovered any hacks or tips for proofing time that changed the game? I would love to hear about it in the comments!
See you soon,


Leave a Reply